WEB BUTTONS HOW TO'S
 How To's
 Implementing Submenu Drop Down Html
- States Drop Down Menu
- Html Code For Menu And Submenus
- Javascript Animated Collapsible Menu
- Help Menu In Bash
- Create Scrolling Menu In Flash Lite
- Recursive Css Collapsible Menu Asp Database
- Javascript Dropdown Submenu
- Bash Script Submenu
- Html Menu Fold
- Html Drop Down Menu Tutorial
- Create A Horizontal Dropdown Menu Bar
- Html Drop Down Navigation Menu Code
- Html Double Drop Down Menu
- Create Simple Menu In C
- Indexhibit Sub Menu
 Features
 Online Help
  FAQ
FAQ


QUICK HELP
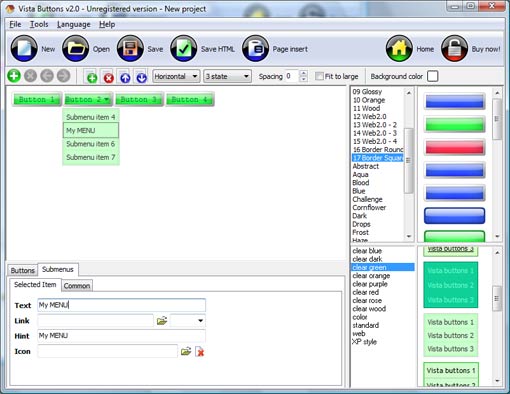
Adjust appearance of the menu.
DROP DOWN MENU HTML TEMPLATE

You'll see that there are 5 buttons now in the work area.


After doing so the menu orientation will change to vertical.

Learn more about menu types from the cascade graphics user guide.
DESCRIPTION
Good navigation is an important step to website success. If people can't find their way around the site, they will quickly give up looking and leave, never to return. So, it's absolute vital that your website has a fast, neat, and
Don't allow your website visitors to get lost. Try Drop Down HTML Menu!
Not a string of code! Code For Css Slide Submenu
Professional Look-n-feel Animer Menu Déroulant
Dhtml Defilement Images Drop Down Menu Html Template Easy, quick, professional Its very easy to create professional high-quality web buttons with the help of Drop Down HTML Menu. Once installed you�ll be making buttons for your web site with no programming or drawing required.
RELATED
MENU SAMPLES
Tabs Style 4 - Icons ButtonsXP Style Olive - Image Button
Css Pull Down Menue Vista Style 4 - 3d Buttons
XP Style Blue - Button Image
Vista Style 8 - Menu Buttons
Vista Style 5 - Animated Buttons
Tabs Style 5 - Web Page Buttons
Creating Menus Using Case Bash
Tabs Style 3 - Buttons Images
SELECTED SAMPLE