WEB BUTTONS HOW TO'S
 How To's
 Collapsible Vertical Drop Down Menu
- Drop Down And Submenu In Javascript
- Css Drop Down Submenu
- Horizontal Submenu Css And Javascript
- Navigation Menu Javascript Howto
- Html Vertical Menu Submenu Css
- Css Tab Dropdown Menu
- Sliding Menu Deviantart
- Collapsible Menu Jquery
- Simple Collapsible Menu
- Accessible Fold Out Menu
- Html Codes Dropdown Menu
- Html Submenu Example
- Visual Basic Slide Menu
- Menu Design In Html Using Javascript
- Floating Menu Jquery
 Features
 Online Help
  FAQ
FAQ


QUICK HELP
SHAREPOINT COLLAPSIBLE MENU
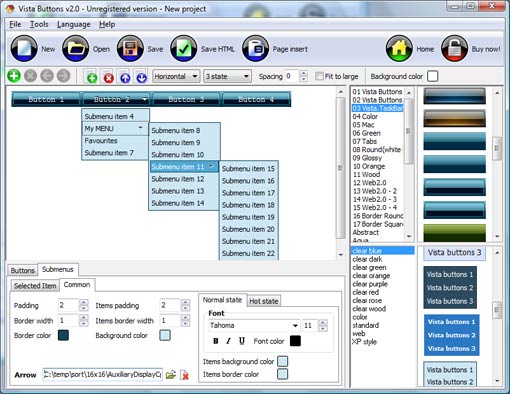
Another way to set the submenu's link is to select it and then click the "Select page" button on the Properties toolbox. Open dialog will appear, in which you can select the page you would like to link to. This page's address will then appear in the "Link" field.
DESCRIPTION
Good navigation system is an important part of web site success. If people can't find their way around the site, they will rapidly give up looking and go, never to return. So, it's very significant that your website has a neat, fast, and
Don't permit your web site visitors to get lost. Try Drop Down HTML Menu!
Instant preview Css Template Crossbrowser
Seamless Integration Drag N Drop Bilder Javascript
Code Pop Up Html Ie Sharepoint Collapsible Menu Adjusting menu appearance
RELATED
MENU SAMPLES
Tabs Style 6 - Buttons DesignXP Style Blue - Button Image
Applet Navi Vista Style 7 - Homepage Buttons
Vista Style 4 - 3d Buttons
Common Style 1 - CSS Button
Vista Style 6 - Buttons Graphics
Vista Style 8 - Menu Buttons
Html Menu And Submenu
Common Style 3 - Web Page Button
SELECTED SAMPLE