WEB BUTTONS HOW TO'S
 How To's
 Html Menu Cascade
- Dropdown Menubar In Html
- Create Menu Css Html
- Drop Down Menu Trees In Html
- Expanding Drop Down Menu
- Javascript Menu Samples
- Casscade Menu Javascript Open Source Firefox
- Create Drop Down Menus
- Collapsible Menus In Javascript
- Hrml Drop Down Menu
- Collapsible Menu Tree
- Dropdown Menu Using Javascript
- Css Vertical Collapsing Menu
- Coding Html Button Sliding Menu
- Javascript Roll Down Menu
- Dropdown Menue For Html
 Features
 Online Help
  FAQ
FAQ


QUICK HELP
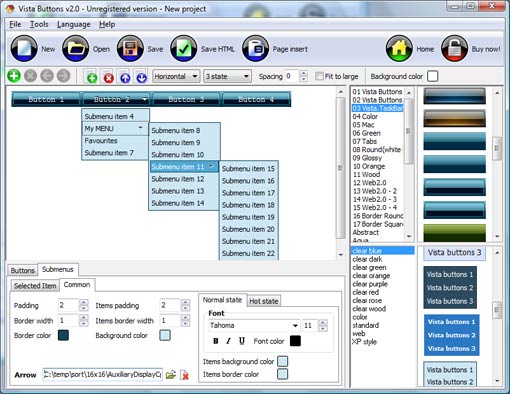
Adjust appearance of the menu.
HOW TO CREATE AN EXPANDABLE MENU
Click "Load image" and select the button image file you would like to add to the theme. It will be opened in the dialog. Here are three state images in the example, so set total images" field value to 3.
To define the button's hot state appearance, set the "State offset" fields to 0, 1, and 2. Then the topmost state image will be set for the Normal state, next image - for the Hot state, and the last state image - for the Pressed state.
Press "Create button" button. Created gif buttons will be added to the current theme and will be opened in the Theme editor.
DESCRIPTION
Good navigation is an important step to website success. If people can't find their way around the site, they will quickly give up looking and leave, never to return. So, it's absolute vital that your website has a fast, neat, and
Don't allow your website visitors to get lost. Try Drop Down DHTML Menu!
Not just buttons Collapse Navigation Javascript DHTML Dropdown Menu is able to create not just separate images of buttons, but also complete web menus. These menus can be either horizontal or vertical, they support �rollover� and �click� effects with full set of javascript and html code. Vista-style menus Css Template Image Rollover Web menus, which are created by DHTML Dropdown Menu, exactly correspond with Windows Vista graphic interface components. That is why the visitors of your site will not have to spend their time in order to familiarize with the unusually-looking navigation. Nevertheless, you are not limited by the standard Windows themes, and you will be able to create your own original buttons. Css Multiple Levels Click Horizontal Menus How To Create An Expandable Menu High Quality and Professional Results
RELATED
MENU SAMPLES
Tabs Style 5 - Web Page ButtonsVista Style 10 - Button Graphics
Cambiar Hover Con Javascript Tabs Style 1 - Buttons gifs
Tabs Style 7 - Button Menu
Vista Style 5 - Animated Buttons
Tabs Style 6 - Buttons Design
Vista Style 1 - Buttons for Web
Html Menu With Submenu
Tabs Style 8 - Web Site Graphics
SELECTED SAMPLE