WEB BUTTONS HOW TO'S
 How To's
 Menus And Submenus In Javascript
- How To Make Collapsible Tabbed Menus
- Collapsible Sharepoint Menus Javascript
- Collapsing Menu Javascript
- Creating Hover Menus In Photoshop
- Create Html Menu Bar
- Ajax Menu Howto
- Html Menu Bar
- Sliding Menu Dockable Javascript
- How To Create Flyout Menu
- Bash Cli Menu
- Collapsible Dropdown Image Menu
- Css Cascade Menus
- Samples Rounded Menubar
- Menu Fold
- Html Web Menus
 Features
 Online Help
  FAQ
FAQ


QUICK HELP
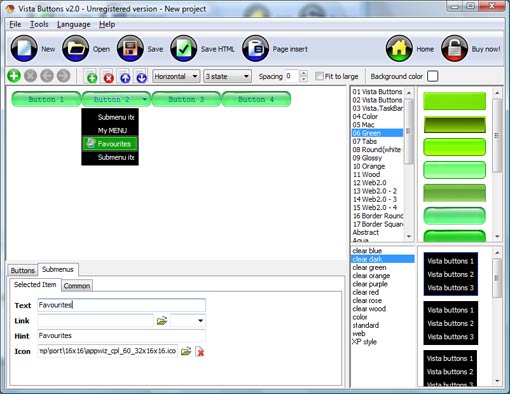
BASH CREATING A MENU
To add this button style to the Themes toolbox, click "File/Theme editor" in the main menu. Create buttons in theme editor. Theme with the entered name will be created and set as current theme in the Theme editor.
Click "New theme" button to create animated buttons in the Themes toolbox. Enter new theme name and special notices and click "Create".
DESCRIPTION
Good navigation system is an important part of web site success. If people can't find their way around the site, they will rapidly give up looking and go, never to return. So, it's very significant that your website has a neat, fast, and
Don't permit your web site visitors to get lost. Try Drop Down DHTML Menu!
3-state rollover buttons Css For Tab Menus
Cost Effective Dynamic Drop Down Menu Ajax
Dynamic Vertical Scroll Menu Bash Creating A Menu Seamless Integration
RELATED
MENU SAMPLES
Tabs Style 7 - Button MenuVista Style 2 - Web Button
Dynamic Form Drop Downs Common Style 3 - Web Page Button
Vista Style 1 - Buttons for Web
XP Style Blue - Button Image
Common Style 4 - Html Button
Tabs Style 2 - Web Buttons
Create A Dropdown Menu In Html
XP Style Metallic - Web Design Graphics
SELECTED SAMPLE