WEB BUTTONS HOW TO'S
 How To's
 Javascript Menubar Can T Goover Frame
- Make Menu C
- Create Collapsing Menu
- Horizontal Menu Collapse
- Drop Down Menu Navigation Html
- Javascript Horizontal Collapsible Menu
- Horizontal Drop Down Menu Script
- Vertical Drop Down Menu
- Create Menu And Submenu Using Html
- Animated Drop Down Menu
- Collapsible Menu Jquery
- Dhtml Horizontal Dropdown Menu
- Create Collapse Menu Using Html
- Pull Down Menu Css Sample
- Php Dynamic Submenu
- Javascript Floating Horizontal Menu
 Features
 Online Help
  FAQ
FAQ


QUICK HELP
HTML DROP DOWN MENU SCRIPT

You'll see that there are 5 buttons now in the work area.


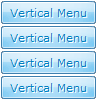
After doing so the menu orientation will change to vertical.

Learn more about menu types from the cascade graphics user guide.
DESCRIPTION
Instant preview Dropdown Generation Using Javascript
Professional Look-n-feel Commandes Css Transparent
Css Layers Horizontal Html Drop Down Menu Script Extended capabilities to save and export the results
RELATED
MENU SAMPLES
Common Style 4 - Html ButtonXP Style Blue - Button Image
Dhtml Simple Horizontal Drop Down Tabs Style 7 - Button Menu
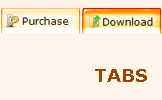
Tabs Style 1 - Buttons gifs
Tabs Style 2 - Web Buttons
Vista Style 2 - Web Button
Vista Style 10 - Button Graphics
Html Double Drop Down Menu
Tabs Style 4 - Icons Buttons
SELECTED SAMPLE