BlogHELPSAMPLESBUY NOW!DOWNLOAD
Collapsible Html Menu ScreenShot

BUY NOW!    FREE TRIAL DOWNLOAD

   QUICK HELP

Adjust appearance of the menu.

  • Define the menu's orientation and menu type.
  • Select vista button by clicking it and change button appearance for normal and mouse over states and set buttons link properties and link target attributes on the "Buttons" tab.
  • Select submenu's item by clicking it and change submenu's appearance for normal and mouse over states and set submenu's item link properties and link target attributes on the "Submenus" tab.

  •    COLLAPSIBLE HTML MENU
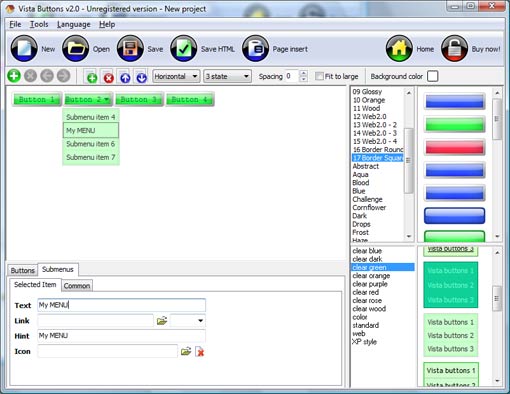
  • Let's assign text to the web menu buttons. Select first web button by clicking it and then enter text in the "Text" field on the Properties toolbox. You will see that, as you enter the text, the selected button's text will change too.


    Then select next web button with click. Enter its text and so on. After finishing, the menu will look like this:

  • Now let's add some icons. Select button and then click the "Open icon" button on the "Normal state" tab of the Properties toolbox.


    "Open" dialog will appear, where you can choose an icon. Other way to assign an icon is to type its full path and name in the "Icon" field ("c:\myicons\stylish_3\pretty.ico", for example). Repeat this for each menu button. You should get something like this in result:

  • Let's change icons' position inside the buttons. To do it you should select all buttons by clicking on the first button, then pressing the Shift key, and then clicking the last web button while still holding the Shift key. You can also press "Ctrl + A" to select all buttons. Then click one of the "Icon Align" buttons on the "Normal State" tab on the Properties toolbox.


    You will see that icons are aligned in the selected way now. In this example we choose Top icon align.

  • Now let's add text shadow to buttons when button in hot state. Select all buttons as described in the previous step and then set the "Shadow" checkbox on the "Hot state" tab of the Properties toolbox.


    Now, when you point mouse at the menu button, shadow will appear under the button text like in the "Products" button of the following example:

  • Let's change the menu theme. To do it just select theme you like in the themes list on the buttons editor toolbox. Then you can browse this theme's button backgrounds. Note, that button backgrounds are previewable. You can look at their behavior while choosing. Just point mouse at it, click it to know how web button will react.


    When you find a button background you like, double-click it to apply. For example, after choosing one of the "01 Vista Buttons" theme's backgrounds, we'll get following results:


  •    DESCRIPTION

  • Apply any font of any color, size and font decoration you need. Use any available type, color and thickness of a menu's frame. Choose any color for submenus and items backgrounds.
  • Specify various values for spacing and padding for the whole menu and for each separate submenu.
  • Create separators using your own pictures, size and alignment.

  • BUY NOW!    FREE TRIAL DOWNLOAD MORE INFO

    Dynamic Html Form MenuEfectos De Estilos Css
    Cost Effective
    • Starts at just $39.95. Buy Now!
    • 30 days free trial version. Download Now!
    • Stop paying month-to-month subscription to web image and icon collections!
    • Don't waste your money on licenses for every new domain where you want to place the menu! Pay once, use for life, anywhere!
    Adjusting menu appearance
    • Create drop down menus based on css
    • Make various styles for each submenu item adjusting css styles
    • Create 1-state, 2-state, 3-state and 3-state toggle buttons
    • Save buttons' images in GIF, JPEG, PNG files
    Drop Down Navigation Generator Css Collapsible Html Menu
    Not a string of code!
    • You will not need any skills in javascript and html with DHTML Dropdown Menu. All programming will be completed for you.
    • There even will be no necessity to edit your html code to insert a completed button-menu. Just point out the place on your page, where you want the buttons to be, and then press "Insert".

    BUY NOW!    FREE TRIAL DOWNLOAD MORE INFO

       RELATED