WEB BUTTONS HOW TO'S
 How To's
 Collapsible Menu Javascript
- Menu Linux
- Tab Menu Slide Css Mac
- Drop Down Html Menus Layers
- Bash Menu Examples
- Menubar Css
- How To Create Menu In Bash
- Javascript Right Click Menu Sample
- Menus In Bash
- Html Drop Menu Code
- Html Drop Down Menu Generator
- Rollover Drop Down Menu Html
- Dvd Automenu Bash Ksh
- Mouseover Drop Down Menu
- Foldout Menu
- Visual Basic Slide Menu
 Features
 Online Help
  FAQ
FAQ


QUICK HELP
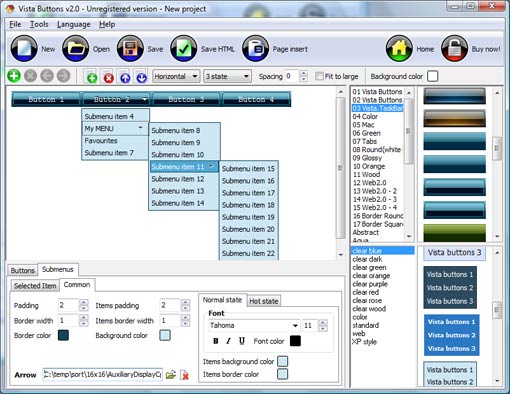
COLLAPSE NAVIGATION MENU TEMPLATE
To create your own theme, you should create the button image states first. It contains button image for each Normal/Hot state of the button, one-by-one, vertically. Button image states is a .bmp file like this one. Each button image state must have the same height. In the example below the button states image has size 50x150. It contains three button state images, 50x50 each.

DESCRIPTION
3-state rollover buttons Dhtml Javascript Tree Menu
Professional Look-n-feel Ajax Drag Drop Javascript
Dynamisches Men Fc Script Collapse Navigation Menu Template Professional Look-n-feel
RELATED
MENU SAMPLES
Vista Style 8 - Menu ButtonsTabs Style 1 - Buttons gifs
Descargar Drag´N Drop Vista Style 9 - Toolbar Buttons
Tabs Style 2 - Web Buttons
XP Style Blue - Button Image
XP Style Olive - Image Button
XP Style Metallic - Web Design Graphics
Glossy Accordion Menu
Vista Style 1 - Buttons for Web
SELECTED SAMPLE